
Custom branding pins: step-by-step guide for 2026
Creating custom branding pins that truly represent your business requires more than picking colors and adding a logo. Quality enamel pins combine thoughtful design, precise manufacturing choices, and attention to production details. This guide walks you through every stage of creating professional branding pins, from initial design preparation to final quality checks. You’ll learn how to avoid common pitfalls, choose the right enamel type for your brand goals, and navigate the ordering process with confidence. Whether you’re launching a promotional campaign or building brand awareness, these steps ensure your pins make a lasting impression.
Table of Contents
- Key takeaways
- Preparing your branding pin design
- Choosing between soft and hard enamel pins
- Step-by-step production and ordering process
- Avoiding common pitfalls and ensuring final quality
- Explore premium custom pins for your brand
- Frequently asked questions
Key Takeaways
| Point | Details |
|---|---|
| Enamel type impact | Soft enamel offers vibrant color and texture at a lower cost, while hard enamel delivers a premium polished finish with longer production times and higher price. |
| Production design rules | Maintain wall thickness between 0.3 and 0.4 mm and keep enamel wells at least 2 mm wide to prevent breakage and color leakage. |
| Design pitfalls to avoid | Avoid trapped enamel and acute corners under 45 degrees, and test legibility by printing at the actual pin size. |
| Artwork preparation | Export vector files with outlined fonts, separate color layers, and request a die line review with the manufacturer before final approval. |
Preparing your branding pin design
Successful branding pins start with technically sound design preparation. Before submitting artwork to manufacturers, you need to understand critical specifications that determine whether your design can be produced successfully. Metal walls require 0.3-0.4mm minimum thickness to prevent breaking during production. Enamel areas must measure at least 2mm to hold color properly without bleeding or gaps.
Design pitfalls cause production delays and disappointing results. Trapped enamel occurs when metal lines create enclosed spaces with no drainage path during manufacturing. Acute corners under 45 degrees create weak points where metal can crack or chip. Text requires special attention because legibility suffers at small sizes. Use 5pt bold sans-serif fonts as your absolute minimum, and test readability by printing your design at actual pin size.
Vector file preparation separates amateur designs from professional ones. Export artwork as AI, EPS, or high-resolution PDF files with outlined fonts and separated color layers. Manufacturers need clean vector paths to create precise metal molds. Raster images like JPEGs lack the mathematical precision required for die cutting. Test your design by zooming to 400% and checking for jagged edges or unclear boundaries between colors.
Collaboration with your manufacturer during the design phase prevents costly revisions. Request a die-line review before finalizing artwork. Experienced manufacturers spot potential issues like metal lines that are too close together or enamel wells that won’t fill cleanly. This feedback loop saves time and ensures your custom pins deliver maximum branding impact from the first production run.
Pro Tip: Create your design 10 times larger than the final pin size, then scale down. This approach makes it easier to spot design flaws and ensures details remain sharp at production scale.
Key preparation checklist:
- Verify all metal lines meet 0.3-0.4mm minimum thickness
- Confirm enamel areas measure at least 2mm across
- Use vector formats with outlined fonts
- Test text legibility at actual pin size
- Review die-line with manufacturer before approval
- Check for trapped enamel and acute corners
- Prepare separate layers for each color
Choosing between soft and hard enamel pins
The enamel type you select fundamentally changes your pin’s appearance, durability, and cost. Soft enamel creates a textured surface where recessed enamel sits below raised metal lines. This dimensional quality gives pins a tactile, handcrafted feel. Colors appear vibrant and slightly glossy, making designs pop visually. Soft enamel costs 15-30% less than hard enamel and produces faster, typically ready within two weeks.
Hard enamel delivers a premium, jewelry-quality finish. Manufacturers overfill enamel wells, then grind and polish the surface until perfectly smooth and flush with metal lines. This process creates scratch-resistant pins that maintain their appearance through heavy use. The polished finish catches light beautifully and feels substantial. Hard enamel production requires additional steps, making it 20-40% more expensive with longer turnaround times of three to four weeks.
Durability considerations affect which enamel type suits your branding goals. Soft enamel pins work beautifully for short-term promotional campaigns, event giveaways, or collectible series where cost efficiency matters. The recessed enamel can chip or fade with constant wear, making them less ideal for pins meant to last years. Hard enamel excels for employee recognition programs, premium merchandise, or any application where pins represent long-term brand investment.
| Feature | Soft Enamel | Hard Enamel |
|---|---|---|
| Surface Texture | Raised metal, recessed enamel | Smooth, flush finish |
| Cost | 15-30% lower | 20-40% higher |
| Production Time | 2 weeks standard | 3-4 weeks standard |
| Durability | Moderate, can chip | Excellent, scratch-resistant |
| Visual Style | Textured, vibrant | Polished, premium |
| Best For | Events, giveaways, collectibles | Employee recognition, premium merch |
Metal plating options enhance both enamel types significantly. Gold plating adds luxury appeal for executive gifts or high-end branding. Black nickel creates modern, sophisticated contrast that makes colors stand out dramatically. Antique finishes provide vintage character perfect for heritage brands or nostalgic campaigns. Consider how plating interacts with your enamel choice and overall design aesthetic to maximize visual impact.
Pro Tip: Order sample pins in both enamel types if budget allows. Physical samples reveal texture and color differences that photos cannot capture, helping you make confident decisions for larger orders.
Selection factors to evaluate:
- Budget constraints and cost per unit
- Expected pin lifespan and wear conditions
- Brand positioning and perceived value
- Event timeline and production deadlines
- Design complexity and color requirements
- Target audience preferences and expectations
Step-by-step production and ordering process
Navigating the custom pin ordering workflow becomes straightforward when you understand each stage. Begin by submitting your design file along with specifications for size, quantity, enamel type, and metal plating. Manufacturers typically respond within 24-48 hours with a detailed quote covering unit costs, setup fees, and shipping estimates. Standard production requires 2-3 weeks from approval to delivery, though express options compress this to 5-7 days for urgent campaigns.
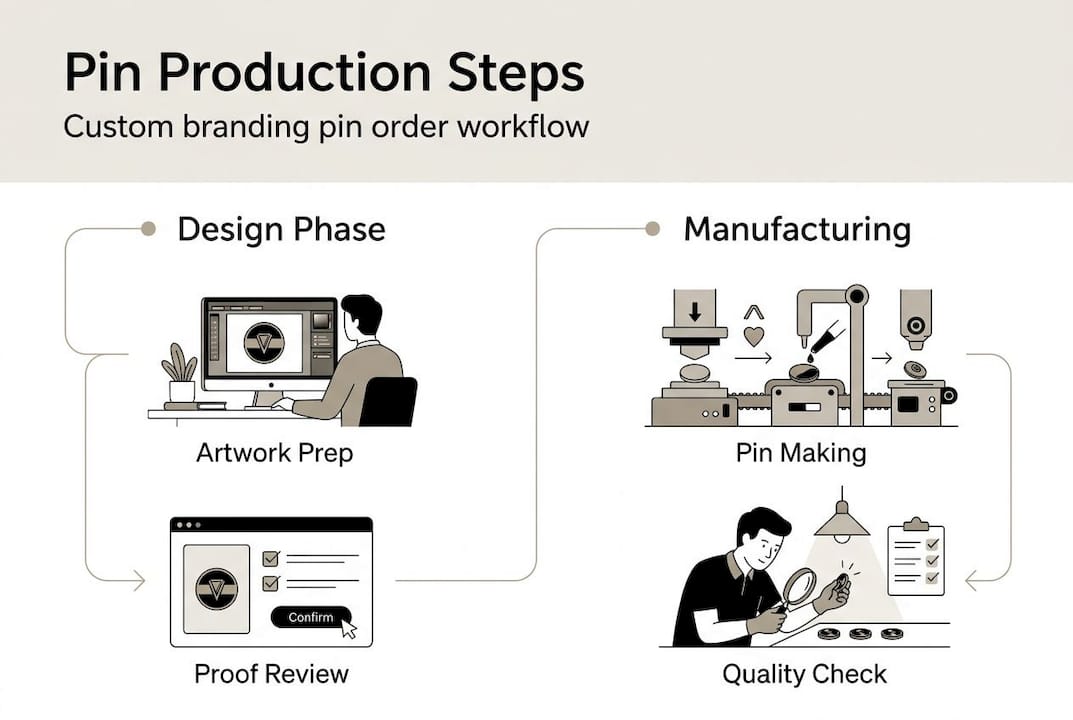
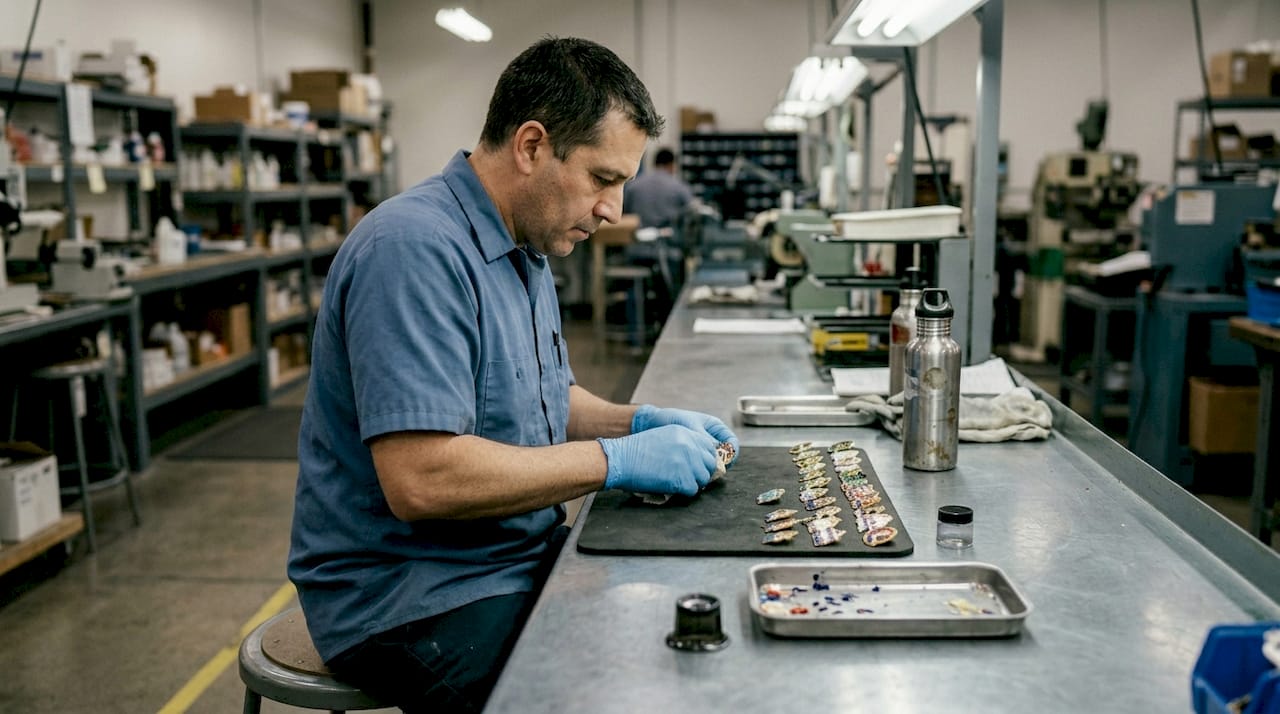
The digital proof stage represents your critical quality checkpoint. Manufacturers send rendered images showing exactly how your design translates to physical pins. Review these proofs meticulously for color accuracy, text legibility, and proper spacing between design elements. Request revisions if anything appears off. Most manufacturers include two to three revision rounds in their base pricing. Never rush proof approval because changes become impossible once production begins.
Payment and production kickoff follow final design approval. Manufacturers typically require 50% deposit upfront with the balance due before shipping. Some offer net payment terms for established business accounts. Once payment clears, your pins enter the production queue. Metal molds get created first, a process taking three to five days. Then enamel filling, curing, and finishing steps proceed according to your chosen enamel type and plating options.
Minimum order quantities usually start around 100 pieces, though some manufacturers accommodate smaller runs at higher per-unit costs. Larger quantities dramatically reduce unit pricing through economies of scale. A 500-piece order might cost 40% less per pin than a 100-piece order. Plan your quantities based on distribution needs, budget, and storage capacity. Ordering extra pins costs less than placing a second small order later.
- Submit design files with complete specifications
- Review and negotiate quote details
- Receive digital proof within 48 hours
- Request revisions if needed, typically 2-3 rounds included
- Approve final proof and submit payment
- Manufacturer creates metal molds, 3-5 days
- Production proceeds, 2-3 weeks standard
- Quality inspection before shipping
- Receive tracking information
- Inspect delivered pins upon arrival
| Production Stage | Timeline | Key Actions |
|---|---|---|
| Quote & Design Review | 1-2 days | Submit files, clarify specifications |
| Digital Proofs | 2-3 days | Review carefully, request changes |
| Mold Creation | 3-5 days | No action needed, manufacturer work |
| Pin Production | 10-15 days | Enamel filling, curing, finishing |
| Shipping | 3-7 days | Track package, prepare for inspection |
Ethical and sustainable manufacturing options increasingly matter to conscious brands. Some manufacturers use recycled metals, eco-friendly packaging, and fair labor practices. These choices might add 10-15% to costs but align your promotional pins with corporate values and appeal to environmentally aware audiences. Ask potential manufacturers about their sustainability practices and certifications before committing to large orders.
Avoiding common pitfalls and ensuring final quality
Design mistakes account for most production problems and disappointing results. Overly detailed artwork with intricate patterns or tiny elements exceeds manufacturing capabilities. Manufacturers cannot reproduce details smaller than minimum specifications, leading to muddy or unclear final products. Thin lines break during production or appear inconsistent across pins. Complex details and thin lines risk rejection or require expensive design modifications before production can proceed.
Gradients and color blending represent another frequent error. Enamel pins use solid color fills because the enamel curing process cannot create smooth color transitions. Attempting gradients results in harsh color bands or complete production failure. Convert gradient designs to solid color blocks with clear boundaries. This limitation actually strengthens designs by forcing bold, graphic approaches that read clearly at small sizes.
File preparation issues cause unnecessary delays and frustration. Submitting raster images instead of vectors forces manufacturers to redraw artwork, adding days to your timeline and risking interpretation errors. Embedded fonts that aren’t outlined can display incorrectly when manufacturers open files. Always outline text, convert effects to paths, and export clean vector files. Include a high-resolution preview image so manufacturers can verify their files match your intent.
Manufacturer collaboration during proofing catches problems before they become permanent. Share your brand guidelines and explain the pin’s intended use. Experienced manufacturers offer valuable suggestions about simplifying complex areas, adjusting colors for better contrast, or modifying metal line placement. This expertise prevents issues you might not anticipate. Building a collaborative relationship with pin manufacturers improves results across multiple orders as they learn your preferences and standards.
“The difference between amateur and professional pin designs often comes down to understanding manufacturing constraints. Designs that look perfect on screen can fail completely in production if they ignore basic technical requirements. Work with your manufacturer, not against them.”
Final quality inspection protects your investment and brand reputation. When pins arrive, examine a representative sample before distributing them. Check color accuracy against approved proofs, verify metal plating matches specifications, and test backing posts for secure attachment. Look for enamel defects like bubbles, underfilled areas, or color bleeding between sections. Reputable manufacturers stand behind their work and replace defective pins, but you must identify issues promptly.
Pro Tip: Photograph your pin inspection process and keep detailed records. If quality issues arise, visual documentation speeds resolution and helps manufacturers understand specific problems for future orders.
Quality checkpoint list:
- Verify colors match approved digital proofs
- Check metal plating for consistency and finish quality
- Inspect enamel for bubbles, gaps, or bleeding
- Test backing posts and clutches for secure attachment
- Confirm pin size matches specifications
- Look for scratches or damage from shipping
- Compare random samples across the full order
- Document any defects with clear photographs
Explore premium custom pins for your brand
Ready to create branding pins that elevate your promotional strategy? PinPerfect specializes in custom enamel pins that combine quality craftsmanship with cultural design expertise. Our most loved designs showcase the vibrant possibilities when technical precision meets creative vision.

Explore unique options like the Tubi 60 bottle magnet or Goldstar bottle magnet for inspiration. Whether you need promotional giveaways, employee recognition pins, or event merchandise, our team collaborates with you through every design and production stage. We handle technical specifications, provide expert guidance on enamel types and finishes, and deliver pins that authentically represent your brand identity. Start your custom order today and discover how professional enamel pins transform ordinary promotional items into memorable brand ambassadors.
Frequently asked questions
What are the differences between soft and hard enamel pins?
Soft enamel pins feature recessed enamel with raised metal lines, creating a textured surface that feels dimensional. They cost 15-30% less and produce faster, making them ideal for promotional campaigns and event giveaways. Hard enamel pins are polished smooth and flush with metal lines, delivering a premium jewelry-quality finish that resists scratches and wear. The choice depends on your budget, timeline, and how long you need pins to maintain their appearance.
How long does it take to produce custom branding pins?
Standard production takes approximately 2-3 weeks from final design approval to delivery. This timeline includes mold creation (3-5 days), enamel filling and curing (10-15 days), and shipping (3-7 days depending on location). Express production options compress turnaround to 5-7 days for urgent campaigns, though they typically cost 30-50% more. Plan your order timeline carefully, especially for events or product launches with fixed dates.
What design elements should I avoid to prevent production issues?
Avoid metal lines thinner than 0.3-0.4mm, which break during production or appear inconsistent. Enamel areas smaller than 2mm won’t fill properly, creating gaps or color bleeding. Never use gradients because enamel curing only supports solid color fills. Keep fonts at 5pt bold sans-serif minimum for legibility. Eliminate trapped enamel areas where metal lines create enclosed spaces with no drainage, and avoid acute corners under 45 degrees that create weak structural points.
Can custom branding pins be eco-friendly?
Yes, many manufacturers now offer sustainable options including recycled metals, eco-friendly packaging materials, and verified fair labor practices. These environmentally conscious choices typically add 10-15% to production costs but align your promotional items with corporate sustainability values. Ask potential manufacturers about their environmental certifications, metal sourcing practices, and packaging options. Eco-friendly pins appeal strongly to environmentally aware audiences and demonstrate authentic commitment to responsible business practices beyond marketing claims.