
How to collaborate on pin design for custom enamel pins
Creating custom enamel pins that authentically represent your brand or cultural identity requires more than artistic vision. It demands effective collaboration between stakeholders, designers, and manufacturers. Many businesses and cultural organizations struggle to translate their ideas into production-ready designs, especially when incorporating meaningful Israeli cultural themes. Without clear communication and structured workflows, projects face delays, quality issues, and designs that fail to resonate. This guide walks you through proven strategies to collaborate successfully on pin design, from initial concept to final production, ensuring your custom enamel pins achieve both visual impact and cultural authenticity.
Table of Contents
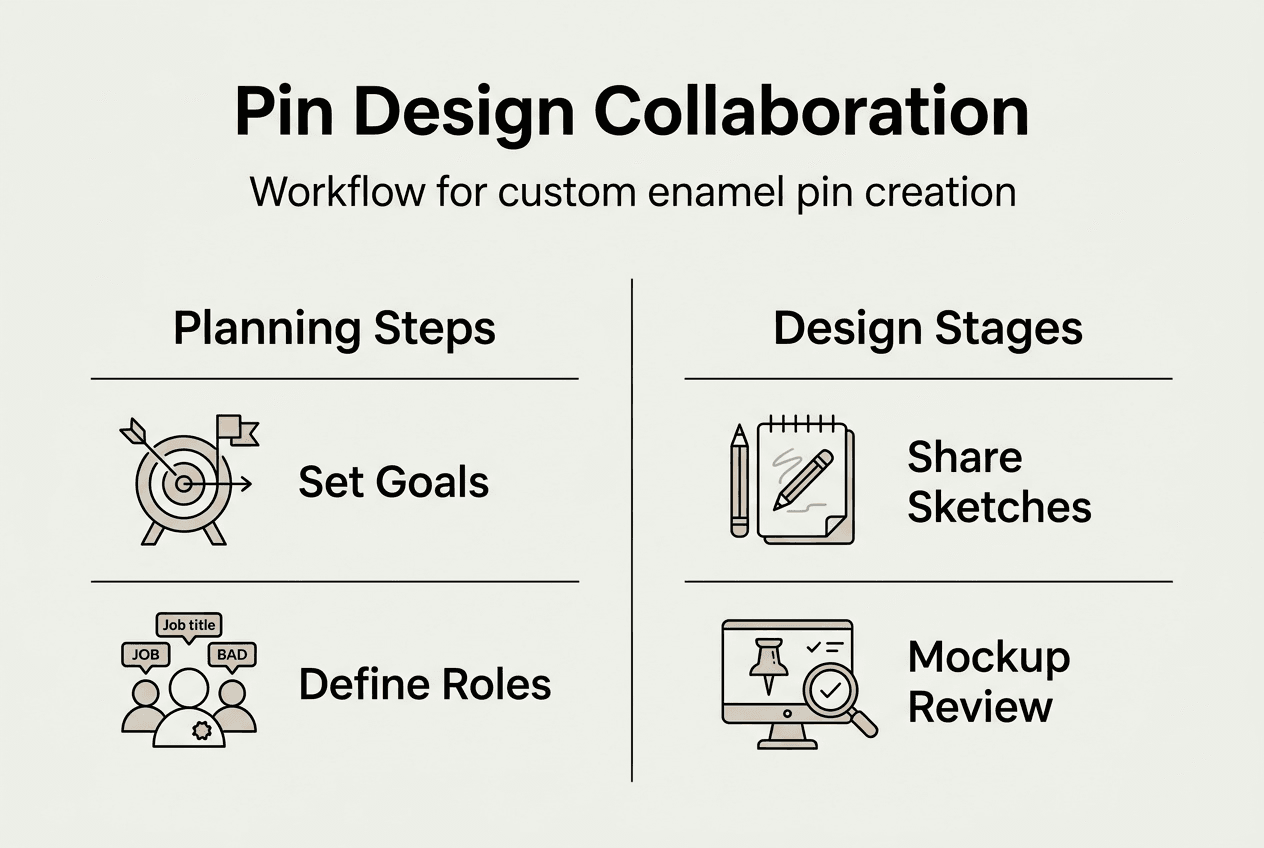
- Understanding Your Pin Design Collaboration Goals
- Preparing For Design Collaboration: Tools, Roles, And Supplier Engagement
- Executing The Collaborative Design Process Step By Step
- Verifying Final Products And Optimizing Future Collaborations
- Explore Custom Enamel Pins And Israel-Themed Designs At Pinperfect
- Frequently Asked Questions
Key takeaways
| Point | Details |
|---|---|
| Structured collaboration process | The workflow includes concept development, design drafting, sampling review, and final production approval |
| Simplicity drives quality | Clean designs with simple shapes translate better into pins and simplify manufacturing |
| Leverage supplier expertise | Early supplier engagement provides access to free design services and technical guidance |
| Pricing factors matter | Pin costs depend on size, plating options, color count, and order volume |
| Cultural branding power | Pins serve as powerful tools to express organizational identity and cultural pride |
Understanding your pin design collaboration goals
Before diving into design collaboration, you need crystal-clear objectives. Are you creating pins for brand recognition at trade shows, commemorating a cultural event, or building merchandise for your organization? Each purpose demands different design approaches and production specifications. Enamel pins are a highly customizable and effective branding tool for businesses and organizations seeking tangible ways to connect with audiences.
Your target audience shapes every design decision. Corporate clients may prefer sleek, professional aesthetics, while cultural organizations often prioritize authentic symbolism and traditional motifs. When incorporating Israeli cultural themes, consider which elements resonate most with your audience. The Star of David, menorah, olive branches, or modern Israeli landmarks each carry distinct meanings. Understanding these nuances ensures your pins communicate the intended message without cultural missteps.
Identify specific design elements that reflect your brand identity or cultural heritage authentically. This might include color palettes matching your brand guidelines, symbols representing organizational values, or imagery celebrating Israeli history and achievements. Document these elements clearly so every collaborator understands the creative direction. When multiple stakeholders contribute input, maintaining focus becomes challenging without documented goals.
Determine what emotional response or action you want your pins to trigger. Should recipients feel pride, connection, or curiosity? Do you want pins displayed on bags, lapels, or collected as memorabilia? These usage contexts influence size, attachment mechanisms, and durability requirements. A pin designed for daily wear needs different specifications than a commemorative piece for display.
Pro Tip: Schedule a kickoff meeting with all stakeholders to align on vision, budget, and timeline before any design work begins. Document decisions in writing to prevent scope creep and miscommunication later. This investment of time upfront prevents costly revisions during production.
Once goals are defined, consider how your pins will boost branding with custom pins through strategic distribution. Will you gift them to customers, sell them as merchandise, or use them for employee recognition? Distribution strategy affects order quantities and packaging needs.
Preparing for design collaboration: tools, roles, and supplier engagement
Effective collaboration requires clear role assignments. Designate a project lead responsible for final decisions and supplier communication. Identify who provides creative input, who reviews designs for brand compliance, and who manages budget approval. Without defined roles, projects stall as team members wait for unclear approvals or duplicate efforts.
Assemble your collaboration toolkit early. Design software like Adobe Illustrator or free alternatives like Inkscape enable precise vector artwork creation. Cloud-based platforms such as Google Drive or Dropbox facilitate file sharing and version control. Communication tools like Slack or Microsoft Teams keep conversations organized by topic. Project management software helps track milestones and deadlines across the custom pin production workflow.
Engage potential suppliers during the planning phase, not after finalizing designs. Many manufacturers offer free design assistance, turning rough concepts into production-ready artwork. This service saves money and leverages technical expertise you may lack internally. When contacting suppliers, ask specific questions about their design support, file format requirements, minimum order quantities, and whether they have experience with cultural or Hebrew text elements.
The design process for custom enamel pins involves steps including design creation, mold creation and sampling, with production taking two to three weeks. Understanding this timeline helps set realistic expectations with stakeholders and plan around event dates or launch deadlines.
| Phase | Duration | Key Activities |
|---|---|---|
| Concept Development | 1-2 weeks | Brainstorming, sketching, stakeholder input |
| Design Refinement | 1-2 weeks | Digital mockups, supplier feedback, revisions |
| Sampling | 2-3 weeks | Physical sample production, review, approval |
| Production | 2-3 weeks | Mass manufacturing, quality control |
| Shipping | 1-2 weeks | International or domestic delivery |
Request sample pins before committing to large production runs. Samples reveal how colors translate from screen to enamel, whether fine details remain legible, and how the pin feels in hand. This quality check prevents discovering problems after manufacturing thousands of units. Budget extra time for sample review and potential design adjustments.
Pro Tip: Create a shared design brief document outlining dimensions, color specifications using Pantone codes, plating preferences like gold or silver, and any text elements. This reference keeps everyone aligned and gives suppliers precise specifications to quote accurately.
Executing the collaborative design process step by step
Start with divergent thinking. Encourage team members to sketch multiple concepts without self-editing. Quantity breeds quality in brainstorming. For Israeli cultural themes, explore various symbolic approaches from historical to contemporary. One concept might feature traditional menorah imagery while another incorporates modern Tel Aviv architecture. Diversity in initial concepts provides options when stakeholder preferences differ.
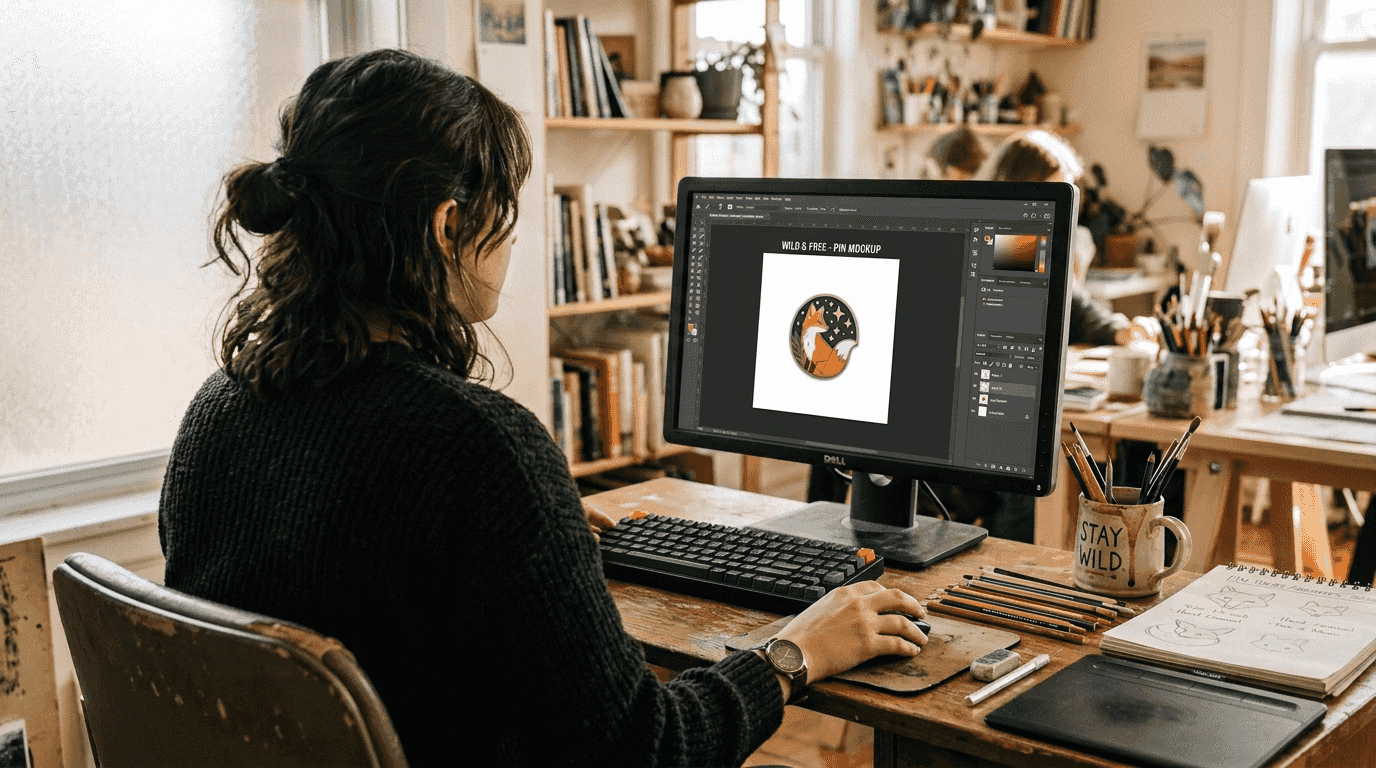
Share initial sketches with your supplier early. Many manufacturers provide digital mockup services, transforming rough drawings into professional renderings that show exactly how the finished pin will appear. These mockups help non-designers visualize the final product and make informed feedback. Suppliers also identify technical challenges like details too small to reproduce or color combinations that increase costs.
Simple shapes and clean lines are always stronger in design creation. Resist the temptation to include intricate patterns or tiny text that disappears at pin scale. Most enamel pins measure between 0.75 and 1.5 inches, leaving limited space for detail. Prioritize bold imagery and high contrast between elements. If including Hebrew text, ensure letters are large enough to remain legible and culturally accurate.
Organize a structured review meeting when mockups are ready. Present designs without revealing which is your personal favorite to avoid biasing feedback. Use a scoring rubric evaluating criteria like brand alignment, cultural authenticity, production feasibility, and visual appeal. This objective approach prevents decisions based solely on subjective preference and ensures the chosen design serves strategic goals.
Once you select a direction, request a physical sample. Screen images never fully represent enamel texture, metal plating shine, or actual size perception. Samples reveal whether adjustments are needed before production. Common issues include colors appearing darker than expected, metal showing through enamel in unintended ways, or attachment posts positioned awkwardly.
Common design elements to consider:
- Plating options: gold, silver, black nickel, rose gold, or antique finishes
- Enamel types: soft enamel with recessed areas or hard enamel with smooth, polished surface
- Backing attachments: butterfly clutch, rubber clutch, magnetic backing, or safety pin
- Border styles: raised metal outline, borderless design, or cut-to-shape edges
- Special features: glitter enamel, glow-in-the-dark elements, or screen-printed details
Gather feedback from a small focus group representing your target audience. Their reactions provide insight into whether your design communicates the intended message. Cultural symbols carry different meanings to different viewers, so testing with diverse perspectives catches potential misinterpretations before mass production.
Approve final specifications in writing, including exact Pantone colors, dimensions, plating type, and order quantity. Confirm pricing, production timeline, and shipping arrangements. Request a pre-production proof if making significant changes after the initial sample. This extra verification step costs little compared to discovering errors in a finished order. Explore bulk enamel pin orders essentials to understand volume pricing breaks and optimize your order size.
Pro Tip: Photograph samples in various lighting conditions and against different backgrounds. Pins appear differently under fluorescent office lights versus natural sunlight. Testing visibility in real-world conditions ensures your design performs well wherever recipients wear or display it.
Verifying final products and optimizing future collaborations
When your order arrives, inspect pins immediately against the approved sample. Check color accuracy, metal plating quality, enamel fill consistency, and attachment security. Examine multiple pins since quality can vary slightly within a production batch. Look for common defects like air bubbles in enamel, scratches on metal surfaces, or loose backing posts.
Document any discrepancies with photographs and contact your supplier promptly. Reputable manufacturers stand behind their work and will remake pins that don’t match approved specifications. However, you must report issues quickly, typically within seven to ten days of delivery. Waiting longer weakens your position if quality disputes arise.
Pricing for custom enamel pins depends on plating options, size and colors, and volume with larger quantities reducing unit costs. Analyze whether your initial order quantity balanced cost savings against inventory risk. If pins sold quickly or generated strong engagement, consider reordering larger quantities to reduce per-unit costs on future batches.
Compare different suppliers if you plan ongoing pin production. Quality and pricing vary significantly across manufacturers. Some excel at complex designs while others offer faster turnaround. Building relationships with multiple suppliers provides backup options and leverage for negotiating better terms. Request quotes from at least three manufacturers when starting new projects.
| Factor | Economy Option | Premium Option | Impact on Collaboration |
|---|---|---|---|
| Sample Turnaround | 3-4 weeks | 1-2 weeks | Faster samples enable quicker iteration |
| Design Support | Basic templates | Custom artwork service | Reduces internal design workload |
| Minimum Order | 100-200 units | 50-100 units | Lower minimums allow testing designs |
| Unit Cost (100 qty) | $2-3 per pin | $4-6 per pin | Budget affects design complexity options |
Review your collaboration workflow to identify bottlenecks. Did approvals take too long? Were design revisions excessive due to unclear initial direction? Did stakeholders provide conflicting feedback? Document lessons learned while the project remains fresh. Create a process improvement plan addressing specific pain points for smoother future collaborations.
Optimize pin distribution and storage:
- Package pins in branded backing cards for professional presentation
- Store in cool, dry locations to prevent tarnishing of metal plating
- Distribute strategically at high-visibility events for maximum brand exposure
- Track which designs generate most engagement to inform future concepts
- Consider creating pin series or collections that encourage collecting behavior
- Leverage social media by encouraging recipients to share photos wearing pins
Measure return on investment beyond simple cost per unit. Track metrics like social media mentions, website traffic spikes after pin distribution, or sales conversions tied to pin campaigns. Understanding business impact justifies future pin investments and guides budget allocation. Pins often deliver value disproportionate to their cost when used strategically.
Consider how pins integrate with broader marketing initiatives. They work exceptionally well as trade show giveaways, employee onboarding gifts, customer loyalty rewards, or fundraising merchandise. Organizations using pins for museum branding pins visitor engagement report increased visitor interaction and memorable experiences that extend beyond the visit.
Build a design library documenting approved artwork, color specifications, and supplier contacts. This resource accelerates future projects by providing starting points and preventing redundant work. Include notes about what worked well and what to avoid, creating institutional knowledge that persists even as team members change.
Explore custom enamel pins and Israel-themed designs at PinPerfect
Ready to bring your collaborative pin design to life? PinPerfect specializes in custom enamel pins that celebrate Israeli culture and organizational identity. Our extensive collection includes everything from the classic Israeli flag enamel pin to unique designs in our Israel friendship flag pin collection, perfect for cultural events, corporate branding, or personal expression.

Our design team collaborates with you throughout the process, offering free design consultation to transform your concepts into production-ready artwork. Whether you need pins for a museum gift shop, corporate event, or nonprofit fundraiser, we handle everything from initial sketches to worldwide shipping. Browse our most loved enamel pin designs for inspiration, or contact us to start your custom project today.
Frequently asked questions
How long does the enamel pin production process take?
Production usually takes two to three weeks after you approve the final design and sample. This timeline covers mold creation, enamel filling, plating, and quality control. Complex designs with multiple colors or special features may require additional time. Rush production is sometimes available for urgent projects but typically costs extra. Plan for five to seven weeks total from initial concept to delivery, including design collaboration and sampling phases.
What if I don’t have design experience for custom pins?
Lack of design skills should not prevent you from creating custom pins. Many suppliers offer free design services if you are unsure how to design enamel pins. Provide your ideas, reference images, logos, or rough sketches, and experienced designers will create professional mockups. This collaborative approach ensures your vision translates into a production-ready design. Focus on communicating your goals and brand identity clearly, and let design professionals handle technical execution.
What design styles work best for enamel pins?
Simple shapes and clean lines are always stronger in design creation. Enamel pins are small, typically one inch or less, so intricate details become muddy and illegible. Bold imagery with high contrast between colors and metal creates striking pins that remain recognizable from a distance. Avoid tiny text, thin lines, or complex patterns. If your design includes multiple elements, ensure adequate spacing between them. Test designs by shrinking them to actual pin size on your screen to verify readability.
How much do custom enamel pins cost?
Pin pricing varies based on several factors. Size significantly impacts cost, with larger pins requiring more materials and labor. Plating options like gold or rose gold cost more than standard silver. Each color adds expense since it requires separate enamel application. Order volume provides the biggest cost savings, with per-unit prices dropping substantially at higher quantities. Expect to pay three to six dollars per pin for small orders of 50 to 100 units, dropping to one to three dollars for orders exceeding 500 units. Request detailed quotes from multiple suppliers to compare pricing structures.
Can I incorporate Hebrew text or Jewish symbols in pin designs?
Absolutely. Custom pins are ideal for expressing cultural identity through Hebrew text, Jewish symbols, or Israeli imagery. Ensure Hebrew characters are large enough to remain legible at pin scale, typically requiring letters at least 3mm tall. Work with designers familiar with Hebrew typography to avoid mirror-image errors or improper letter spacing. Common Jewish symbols like the Star of David, menorah, hamsa, or chai translate beautifully into pin designs. Verify cultural accuracy by having native Hebrew speakers or cultural consultants review designs before production to ensure respectful, authentic representation.